Searching for "mickey"

Mickey and Minnie Mouse Inspired St. Patrick’s Day Craft

Mickey and Minnie Mouse St Patty Craft

 Looking for a simple St. Patrick’s Day themed craft to make with your little Mouseketeer?

This week I made these Mickey and Minnie Mouse inspired over-sized magnets with a great group of 1st and 2nd grade students. The kids proudly constructed their projects in just over a half hour and I’m thrilled to report that their was little clean up left behind! With the use of glue dots and adhesive-backed foam, there were no sticky tables, fingers or clothing!

Today I’ll share with you the simple craft tutorial, including a list of supplies and a printable template for you to use with your children.

Craft Supplies

Supplies:

  • One 8 1/2″ x 11″ sheet of black craft foam (This will be enough for two sets of Mickey and Minnie magnets.)
  • One 8 1/2″ x 11″ sheet of green craft foam (You’ll only us about a quarter of this sheet.)
  • One sheet of adhesive-backed white craft foam (the smallest size sheet you can find will work)
  • Glue Dots Adhesives (I purchased the above package for the class to use and each child used one sheet to make the two magnets.)
  • Hole Punch
  • Four 1/2″ self adhesive round magnets (two for each mouse)
  • Template ~ Here’s a PDF of the template I made for the kids to use.  It was drawn quickly by an unsteady hand, so no judging people.

 St. Patrick’s Mickey and Minnie Template

  • Scissors
  • Pencil

Tutorial

Mickey Mouse St. Patricks craft template

  1. Print out the template on card stock.
  2. Cut the four images out
  3. On the black foam, trace the rectangular image once and the Mickey image twice, then cut them out.
  4. On the green foam, trace the bow and hat image and cut them out.
  5. Using a standard hole punch, punch approximately 15 pieces of the white foam.
  6. To create the Mickey inspired magnet, attach the hat onto the Mickey by using a few of the glue dots.
  7. Add the black rectangular piece to the green hat with two glue dots.
  8. To create the Minnie inspired magnet, stick the fifteen white foam punches onto the green bow simply by peeling the backing off of the white foam.  Don’t you love self adhesive!
  9. Secure Minnie’s bow onto her black foam head with the use of a few glue dots.
  10. Flip Mickey and Minnie over and add a magnet to each ear. Again, just peel the paper off and stick them to the foam.

That’s it! Throw away the peeled away paper and you’re done cleaning up!

Mickey and Minnie St. Patrick's Day Craft

Happy St. Patrick’s Day!

Simple Mickey and Minnie Mouse Inspired Valentine Garland Craft

 Mickey and Minnie Valentine Garland by MouseEarsMom.com

Get out the paper, glue sticks, scissors, ribbon, and cookie cutters, it’s time to beat the snowed-in boredom!

We’ve had quite a few snow days lately. If you have children, then you know that playing in the snow doesn’t fill an entire day for our little Mouseketeers.  The kids and I have been occupying that time with some fun Valentine crafts. Today I’m sharing how we made our Mickey and Minnie Mouse inspired valentine garland.

Supplies:

  • red cardstock
  • black cardstock
  • white card stock
  • standard hole punch
  • 1″ hole punch
  • two different size heart cookie cutters
  • glue stick
  • pencil
  • ribbon

www.mouseearsmom.com

Now start tracing and cutting out your hearts from the red and black cardstock.

Both Mickey and Minnie Mouse hearts are made by cutting off the top half of a black heart and gluing the black piece onto the top half of a red heart. The Mickey Mouse inspired hearts have his two white buttons and the Minnie hearts have her polka dots.  For Mickey’s buttons, punch two 1″ circles from the white card stock and glue the circles onto the red bottom half of a heart. For Minnie’s polka dots, we used a stand hole punch on white card stock and punched out 10 miniature circles.  (Remember to empty your hole punch before making Minnie’s polka dots.  It’ll save you from the clean up when your son dumps a hundred punches all over the table….experience has taught me.)

Once your hearts are glued and dried, use the standard hole punch to create holes on both sides of each heart. Connect the hearts together with some cute ribbons. Now you and your Mousketeers have made the cutest little Mickey and Minnie Valentine Garland in town!

Mickey and Minnie Inspired Valentine Garland www.mouseearsmom.com

Have you made any Disney-inspired Valentine’s Day decorations this year? I’d love for you to share them with me! Post a photo of your project on the Mouse Ears Mom Facebook page or if you’re a blogger and you have a tutorial, great!  Share the link in the comments!

Breakfast with Mickey Mouse at Disneyland Resort

PCH Grill at Paradise Pier

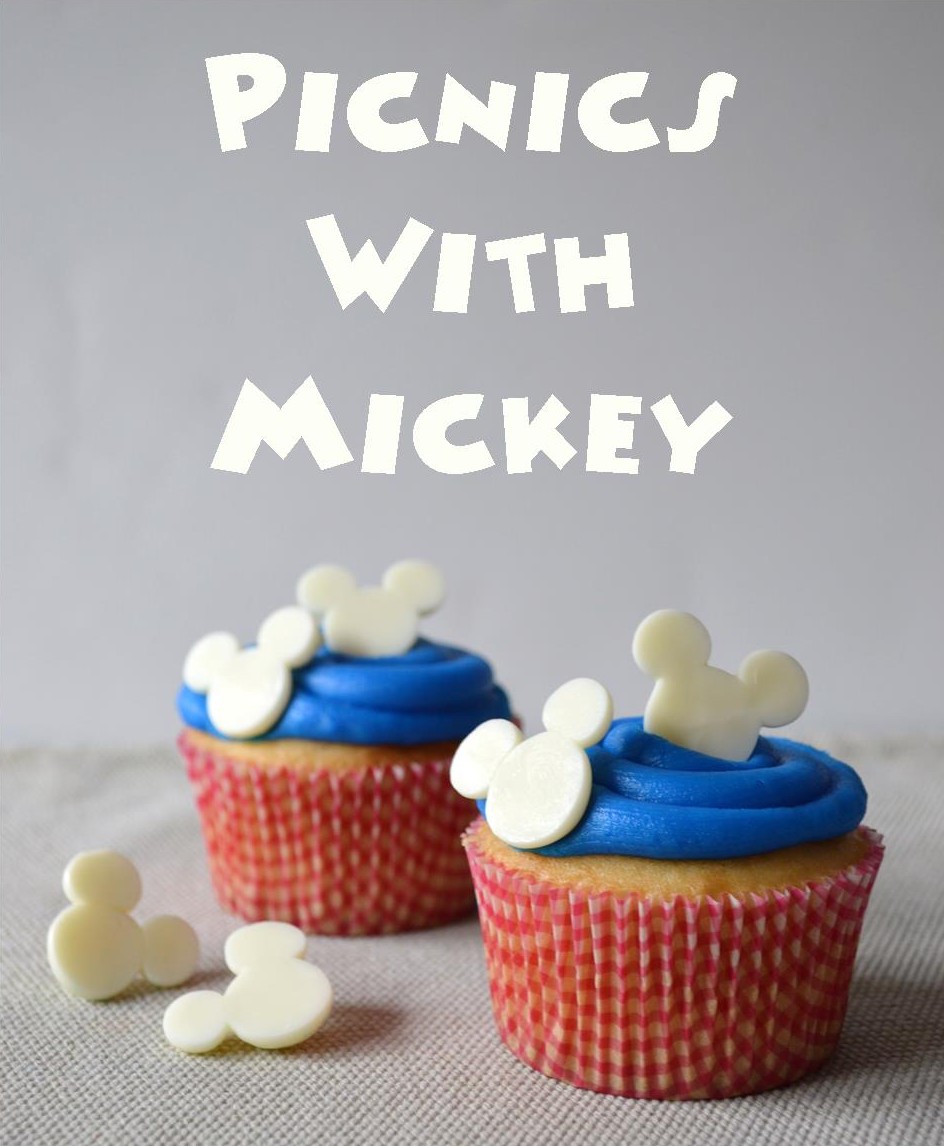
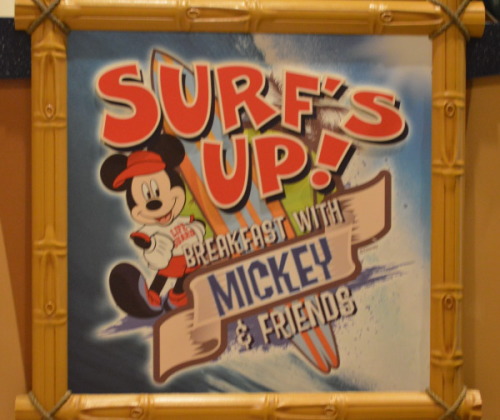
Are we having breakfast with Mickey?

For my family, every Walt Disney World vacation includes a breakfast with Mickey Mouse at Chef Mickey’s.  The kids enjoy visiting, getting autographs and taking pictures with Mickey and his closest friends.  So when planning our trip to Disneyland Resort in California, Gavin and Victoria asked if they would have their traditional breakfast with Mickey.  After a bit of research I found that the only location at Disneyland Resort to offer breakfast with Mickey is at Disney’s PCH Grill located at Disney’s Paradise Pier Hotel. If you’re planning a trip to the Disneyland Resort and you’d like to know more about this breakfast experience here’s more information!

Disney's Paradise Pier Hotel

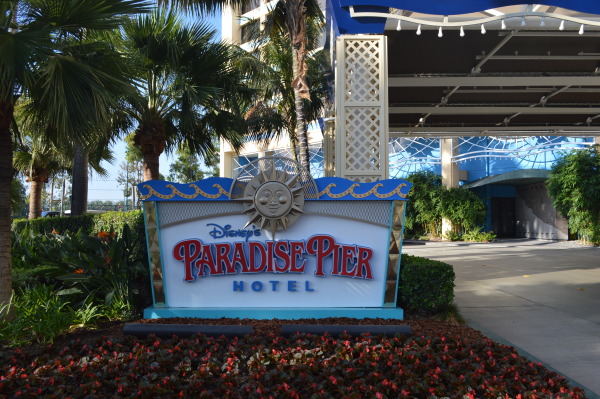
Disneyland Resort has three hotels, and each has its own character dining opportunity. Disneyland Hotel is home to Goofy’s Kitchen, where Goofy hosts a fun-filled dining experience where a few of his friends (characters vary, but history shows usually Chip, Dale and Minnie ) join him for a goofy good time. At Disney’s Grand Californian Hotel & Spa guests can dine with a host of furry Disney characters at Chip ‘n Dale’s Critter Breakfast located within Storytellers Café.  Last but certainly not least, guests can enjoy a tasty buffet with, non other than the king of the kingdom, Mickey Mouse and his closest friends (minus Goofy of course) at PCH Grill located within Paradise Pier Hotel.

Disney's Paradise Peir Hotel

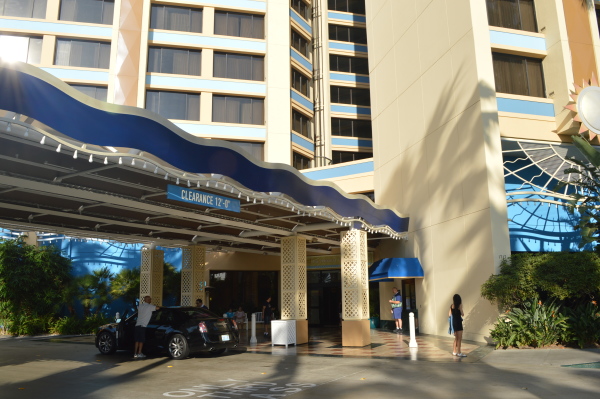
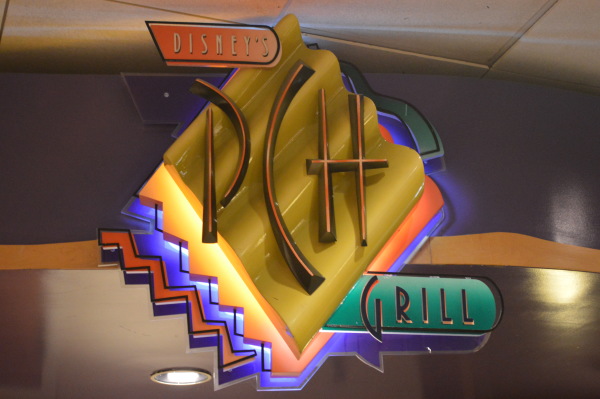
To get to PCH Grill you’ll enter the hotel under the beautiful porte cochere and walk to the right.  You’ll find Mickey in Paradise gift shop and just beyond the shop is the restaurant.

Surf's Up Breakfast at Disneyland

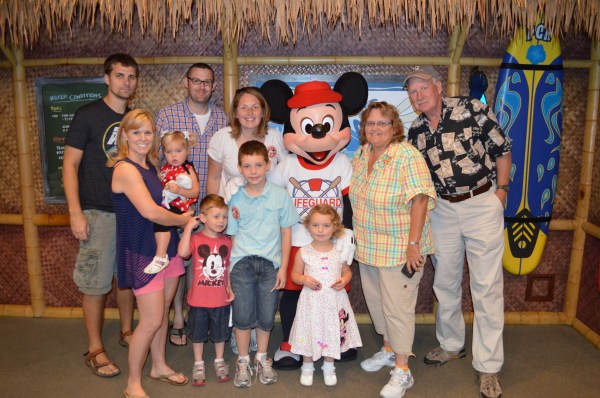
We had breakfast reservations for the first spot of the morning. Our party consisted of ten, so I made sure to have our reservations booked in advance. (Reservations can be made 60 days in advance.) I had never entered into a character dining experience just as it opened.  It was pretty cool to see the calm before the crazy storm of children and characters.

Surf's Up! Breakfast with Mickey @DisneylandThe décor of the restaurant was beach themed. Thatched roofs and surf board accents were found throughout PCH Grill.

Surfs Up Breakfast

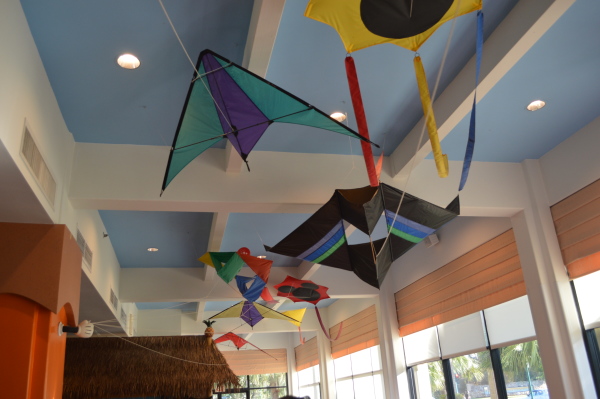
Let’s go fly a kite on the beach! I especially loved the Mickey Mouse hand holding onto all of the kites that hung from the ceiling – so cute!

Character Experience Review

Surf's Up! Breakfast with Mickey & Friends

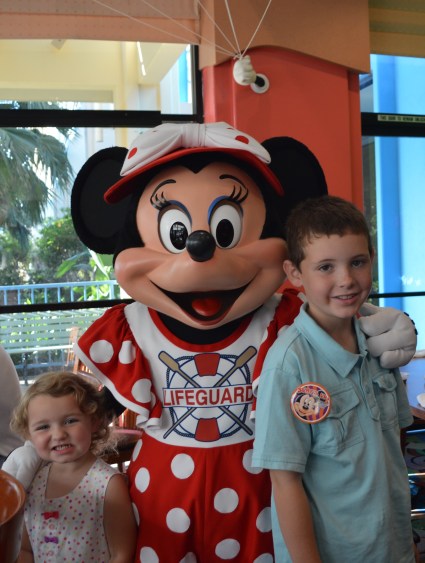
The characters were dressed for the beach! Minnie and Mickey Mouse looked adorable in their Lifeguard attire. In addition to seeing Minnie and Mickey we spent a few minutes with Stich, Pluto, AND Daisy Duck. Each time we eat at Chef Mickey’s located in Walt Disney World, the kids are disappointed that Daisy Duck is not there. They were so excited to meet her this time!

Meeting the characters was a blast, but I do have to warn you that it took a long time to meet them all.  I quickly noticed a difference between the experiences at Chef Mickey’s and the Surf’s Up Breakfast with Mickey.  In California, character dining is much more laid back.  When we arrived our party of ten was all over the place. Gavin had to use the rest room and my nephew had fallen and had cut his lip so my sister-in-law was tending to him. They seated us anyways and told us to visit with Mickey Mouse whenever we were ready – which was really nice to not be rushed. In Florida, unless your entire party is ready with bells on, you’re not getting in!

Mickey Mouse is stationed in front of a themed backdrop, waiting for you to visit and his friends wander about the restaurant visiting guests at their table.  Because it’s so laid back we noticed each character danced, played with the children, and wandered about without a clear visiting route to the table.  Stitch and Pluto danced with the kids at the very beginning, but then Stitch disappeared and we didn’t see him back in our section of the restaurant for our entire lengthy stay. My brother and his family, my parents, and even my husband left the restaurant before Minnie Mouse came to our table. I stayed with Victoria and Gavin while Cast Members cleaned our table off and eventually she found us!

Service

Surf's Up Breakfast with Mickey

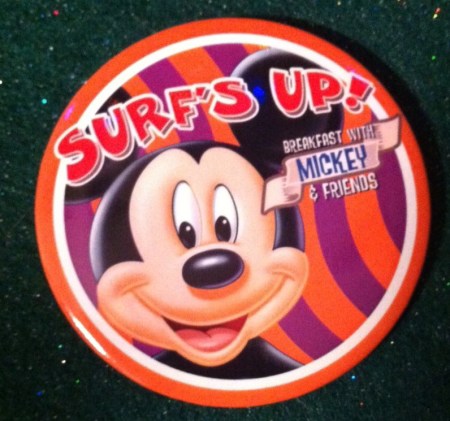
The Cast Member assigned to our table was wonderful!  He attended to our large party and all of our craziness with a smile and professionalism.  He even gave each one of us this super cool pin!

Food

OK- so I’m not a huge food critic but I have three words for you.  Banana-Carmel French Toast! It was yummy times ten. The other food paled in comparison.  All jokes aside, the food options get two thumbs up from me! The kids had a great big helping of fresh fruit. Gavin ate a ton of a variety of food~ so no complaints there!

Surfs Up Breakfast with Mickey and Friends

     Surf’s Up Dude!

The kids and I agree, if you’re not in a rush, and you’re looking for a laid back breakfast with character fun, Surf’s Up Breakfast with Mickey and friends is a great choice!


Mickey Mouse Inspired Pumpkin Cupcakes

Mickey Mouse Pumpkin CupcakesHappy Halloween Week Everyone!

One of my favorite things about visiting a Disney Park during the holiday seasons is the festive cupcakes and treats that Disney sells.  While visiting Disneyland Resort I enjoyed seeing the Halloween creations made by Disney’s talented Cast Members and as usual, they did not disappoint.  Here’s a look at some of my favorites!

Halloween Treats at Disneyland ResortAnytime of the year you can find amazing character apples, but I think during the Halloween season the selection is Spooktacular!

Halloween Treats at Disneyland Resort

As soon as I saw Mickey Mummy treats I wanted to run home and make them!

Disneyland Halloween treats

However, first I decided to make my version of these adorable Mickey Mouse pumpkin cupcakes! They were so easy to make. It took less than a half hour for 20 cupcakes. Would you like to make some during this week of Halloween?

My simple version of Disneyland’s cupcakes have a marshmallow based icing. I used the “Super-Easy Marshmallow Icing” recipe by King Arthur Flour. You can check out the photo tutorial on how I made the cupcakes, including the icing below.

Gather your supplies. The icing recipe is for 24 cupcakes so that’s how many cupcakes I made.  However, I was only able to transform 20 cupcakes before running out of icing.

Mouse Ears Mom.com

You’ll need the recipe for the “Super-Easy Marshmallow Icing” and you can find it here:

http://www.kingarthurflour.com/recipes/super-easy-marshmallow-icing-recipe .

  • Tootsie Rolls (Not Shown Below) are used for the pumpkin stem.
  • Chocolate wafer melts (Not Shown Below) are used for Mickey’s Ears.
  • Green icing- optional (Not Shown Below) is used to make the leaf.
  • The photo below shows you the ingredients I used to make the icing: Salt, Vanilla Extract, Heavy Cream, Powdered Sugar and Marshmallows.

http://www.kingarthurflour.com/recipes/super-easy-marshmallow-icing-recipe ingredients

As the recipe states, make sure you continuously stir the ingredients while they are heating or the marshmallows will stick. It took a bit longer than I expected for the marshmallows to start to melt and then all of a sudden it started sticking at warp speed.

Mouse Ears Mom.com

Once the marshmallows, heavy cream, sugar, and salt have blended together this is what the icing looked like.Mouse Ears Mom.com

After I poured the mixture into a large mixer bowl, I added the vanilla AND equal amounts of red and yellow food coloring to create orange icing.

Mouse Ears Mom.com

As the recipe suggested, I covered the orange icing and refrigerated it overnight.

marshmallow icing

The next day I used my mixer to whip the icing into shape and I was ready to go!

www.mouseearsmom.com

I played around with different icing tips creating different kinds of pumpkin cupcakes.  I found that I liked the Wilton #12 tip’s results the best.  I piled icing in the center of each cupcake and covered the center by starting at the cake and meeting the icing at the top.

Pumpkin cupcake. Mouse Ears Mom.com

After covering the cupcake with icing I pushed an unwrapped Tootsie Roll through the center of the icing.

Mickey pumpkin cupcake

Add a two chocolate wafers for ears and you’re done!

Happy Halloween Everyone!

Picnicking With Mickey Cupcakes

Picnic mickey

Are you planning a family picnic this Memorial Day Weekend? Add a little Disney magic to a simple cupcake by adding these easy-to-make Mickey Mouse chocolates.

Mickey chocolates

To make these chocolates you’ll need chocolate candy melts, wax paper, a microwave safe squeeze bottle or microwave safe disposable decorating bags and my Mickey Mouse template.

Below is the template that I created with the use of a Mickey Mouse craft punch.  Print it out to get started!

Mickey Mouse chocolates template

Mickey chocolates 010

Using the template underneath a sheet of wax paper makes creating Mickey Mouse candies a breeze.  Simply melt the chocolate in the squeeze bottle or in your decorating bag, snip a small hole at the end and then cover the blue Mickey heads with chocolate. Once the chocolate has cooled, flip them over and your miniature Mickeys are ready to magically transform your cupcakes!

One important tip to make your candies fabulous ~ do not try to trace the Mickey head to create the candy.  This will give the candies bubbles on the back side, instead of the smooth finish you see on the candies pictured on the blue plate.  Instead, apply chocolate in the center of the large circle until it fills the entire circle.  Follow with adding the ears by applying chocolate again in the center of one ear until it fills the ear and then complete Mickey by adding his last ear.  Talk about easy!

Mickey chocolates 023

Have a Magical Monday everyone!