Category: Disney-Inspired Crafts

Rain Day? Simple 30-Minute Disney Kids Craft

Mod Podge Coasters

 Rain in your forecast?  Here’s a Disney inspired project to make with your little Mouseketeers that’s sure to add a bit of pixie dust to their day.

My daughter and I love to walk the isles of our local fabric store.  Although she’s three and I’m thirty…something…we both enjoy pulling out the rolls of pretty prints to see the beautiful designs and touch the many different textures. Of course her favorite row to shop is the licensed Disney character fabric!  Unfortunately, I don’t know how to sew much more than a button and a simple back-stitch, so we end up putting the rolls back on the shelf after touching. However, every now and then I come up with a simple craft idea using a bit of magical Disney fabric and this is one!

So, take your Mouseketeer to the local fabric store and set him free to find his favorite Disney characters plastered all over a cheerful fun-filled piece of fabric. All you’ll need to purchase is a quarter of a yard. (It won’t cost more than $1 or $2 (US).) Next, visit the wood project isle and you’re sure to find a set of wooden coasters.  Our store sold a six piece set for $1 (US). If you have a large group of Mouseketeers, Amazon sells a set of 50 plain white square coasters for $8.96. (I did this project in an after-school art program for 20 children and they worked perfectly!)   Last, but not least, you’ll need a foam brush and some Mod Podge.  That’s it!

Here’s a recap of the supplies:

  • Mod Podge
  • Fabric (.25 yards is more than enough to pick out images you’ll like on the coasters)
  • Disposable foam brush (easiest for little hands to use)
  • Coasters
  • Fabric pencil (optional- it may help you when your cutting out your squares)
  • Scissors

Now that you have your supplies, you’re ready to take on any rainy afternoon!

coaster supplies MouseEarsMom.com

If you’ve never used Mod Podge before, here are the simple steps to make the Disney-inspired coasters. For preschool and early elementary age kids, I would recommend Step 1 & 2 you complete for them and then turn the next step over to them.

  1. Trace the outline of a plain coaster on top of the fabric image you would like to adhere onto the coaster.
  2. Cut out the traced coaster image that you marked on the fabric. (I chose to cut the fabric square a touch smaller than the footprint of the original coaster because I wanted the white of the coasters to act as a frame to the fabric design.
  3. Apply Mod Podge evenly on the top of the plain coaster. (Kids love this part!!)
  4. Place the fabric on top of the Mod Podged coaster and allow it to dry for a few minutes.
  5. Once it starts to dry, then apply a layer of Mod Podge on top of the fabric. Allow this layer to dry completely.It will seal the coaster and allow it to have a smooth finish.  (After this layer dried, I chose to also go over the top one more time with a final coat. However, this isn’t needed.)
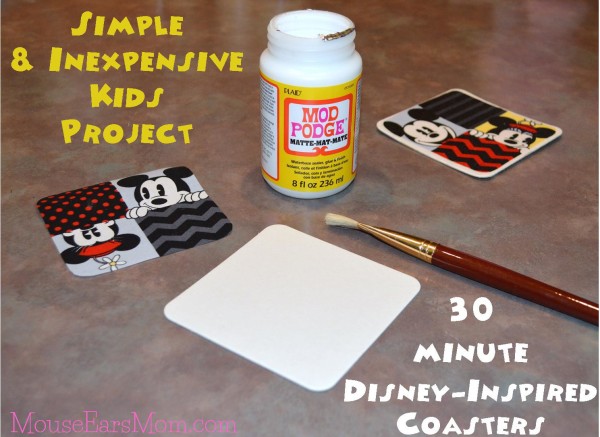
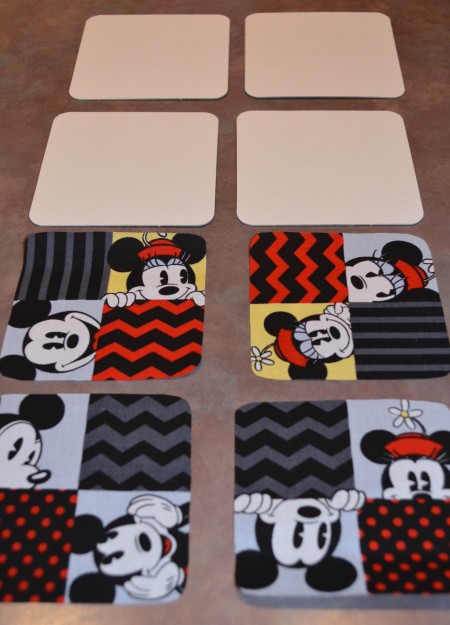
The crafting time is less than the shopping time for this project so bring your Mouseketeer with you to pick out the fabric.  It’s a Disney memory making experience from start to end!

Have you used Disney graphic fabric in any of your crafts?  If so, I’d love to see your creations! Feel free to share them in the comments or on my Facebook page at https://www.facebook.com/MouseEarsMom , include any links to your tutorials too!

Until next time, I hope your nights are full of dreaming and your days are wishes come true!

Thanks for stopping by!

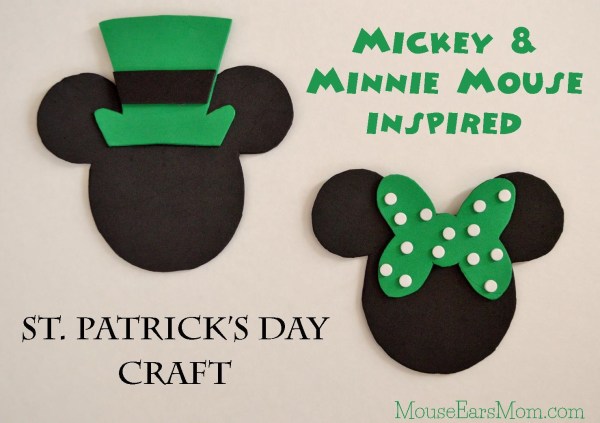
Mickey and Minnie Mouse Inspired St. Patrick’s Day Craft

Mickey and Minnie Mouse St Patty Craft

 Looking for a simple St. Patrick’s Day themed craft to make with your little Mouseketeer?

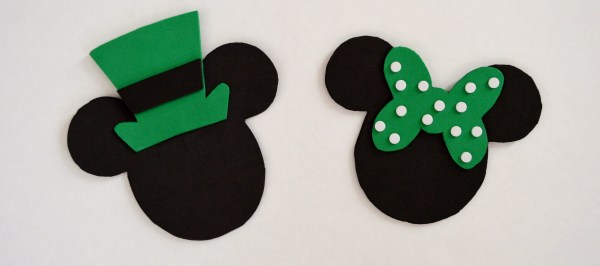
This week I made these Mickey and Minnie Mouse inspired over-sized magnets with a great group of 1st and 2nd grade students. The kids proudly constructed their projects in just over a half hour and I’m thrilled to report that their was little clean up left behind! With the use of glue dots and adhesive-backed foam, there were no sticky tables, fingers or clothing!

Today I’ll share with you the simple craft tutorial, including a list of supplies and a printable template for you to use with your children.

Craft Supplies

Supplies:

  • One 8 1/2″ x 11″ sheet of black craft foam (This will be enough for two sets of Mickey and Minnie magnets.)
  • One 8 1/2″ x 11″ sheet of green craft foam (You’ll only us about a quarter of this sheet.)
  • One sheet of adhesive-backed white craft foam (the smallest size sheet you can find will work)
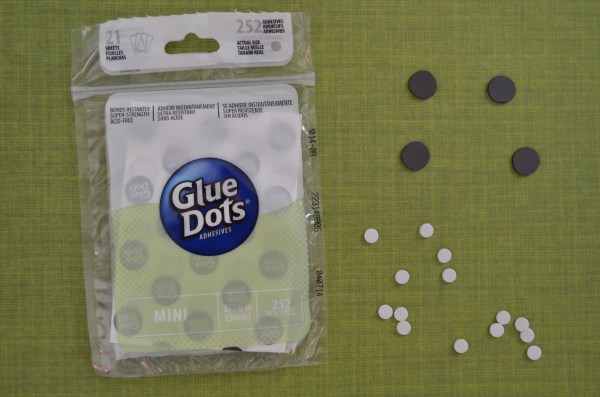
  • Glue Dots Adhesives (I purchased the above package for the class to use and each child used one sheet to make the two magnets.)
  • Hole Punch
  • Four 1/2″ self adhesive round magnets (two for each mouse)
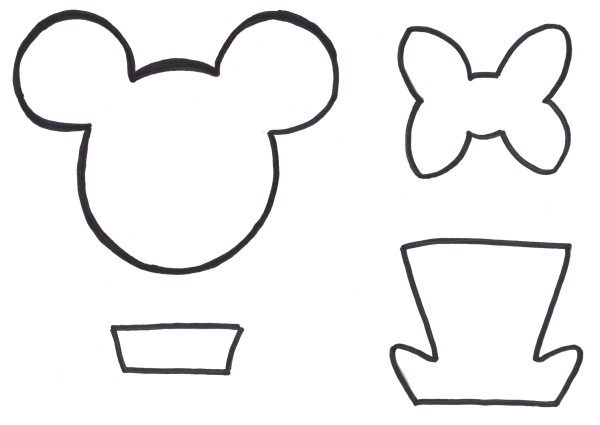
  • Template ~ Here’s a PDF of the template I made for the kids to use.  It was drawn quickly by an unsteady hand, so no judging people.

 St. Patrick’s Mickey and Minnie Template

  • Scissors
  • Pencil

Tutorial

Mickey Mouse St. Patricks craft template

  1. Print out the template on card stock.
  2. Cut the four images out
  3. On the black foam, trace the rectangular image once and the Mickey image twice, then cut them out.
  4. On the green foam, trace the bow and hat image and cut them out.
  5. Using a standard hole punch, punch approximately 15 pieces of the white foam.
  6. To create the Mickey inspired magnet, attach the hat onto the Mickey by using a few of the glue dots.
  7. Add the black rectangular piece to the green hat with two glue dots.
  8. To create the Minnie inspired magnet, stick the fifteen white foam punches onto the green bow simply by peeling the backing off of the white foam.  Don’t you love self adhesive!
  9. Secure Minnie’s bow onto her black foam head with the use of a few glue dots.
  10. Flip Mickey and Minnie over and add a magnet to each ear. Again, just peel the paper off and stick them to the foam.

That’s it! Throw away the peeled away paper and you’re done cleaning up!

Mickey and Minnie St. Patrick's Day Craft

Happy St. Patrick’s Day!

Craft Time with Preschool and Early Elementary Age Disney Fans

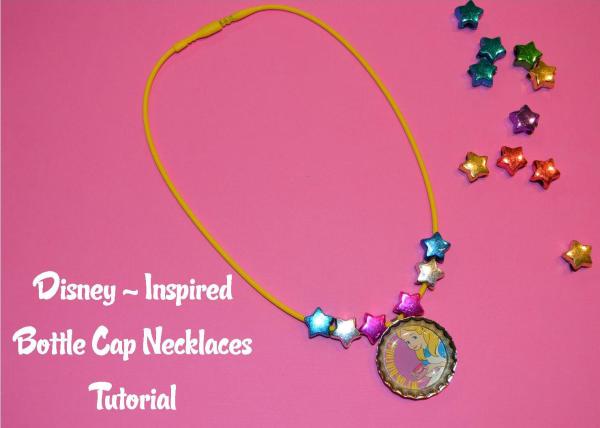
Bottle cap necklaces

During the next three weeks I will be sharing some simple and inexpensive Disney – inspired craft ideas that are perfect for preschool and early elementary age children. I completed each of these crafts with a fun group of 1st and 2nd grade students and they’ve proved that the projects can be completed in less than an hour!

Today’s craft is Bottle Cap Jewelry.

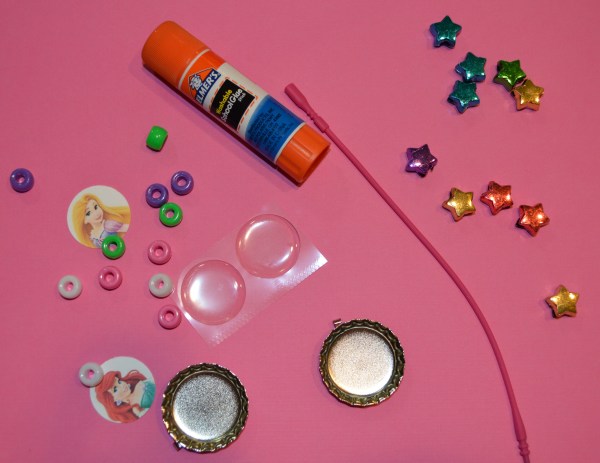
My Supplies:

  • White card stock
  • Glue Stick
  • 1 inch circle hole punch
  • 1 inch Bottle caps with loop (I used Darice brand- note, that the size of the loop was not consistent and some of the loops broke, so I’d recommend purchasing from a craft store so you can inspect them before purchase.)
  • 1 inch Epoxy stickers (I used Beadaholic brand.)
  • Silkies brand necklaces and bracelets (The simplicity in using these necklaces with young children was wonderful!)
  • Craft beads (If you choose to use Silkies brand necklaces and bracelets, purchase craft beads with a wide opening to fit over the end.)

www.mouseearsmom.com

Tutorial:  (I’d recommend completing steps 1 & 2 before starting the project with the kids.)

  1. Google images of your child’s favorite Disney characters, for example “Disney’s Frozen characters.” Pick out a clear image of the characters faces and save them to your computer. (Note: The images are most likely copyrighted images from Disney so make sure you are using them for personal use only.)
  2. Import the image into Microsoft Publisher and resize the character image so that the face is no larger than 1 inch. Print your images out on card stock.
  3. Using a 1 inch circle hold punch, create the circle images for the inside of the bottle caps by punching the images from the printed card stock.
  4.  Apply glue to the back of the 1 inch circle card stock with the character image.
  5. Center the image on the bottle cap using the loop as the top of the image.
  6. Place an epoxy sticker on top of the image.
  7. String the beads and bottle caps onto the necklace or bracelet.

That’s it!  I worked on this project today with 17 little ones and I was shocked at how quiet the room got when the kids were stringing their beads.  This was serious business people!!

Now it’s your turn ~ make a bottle cap necklace or bracelet with your little Mousketeers!

Simple Mickey and Minnie Mouse Inspired Valentine Garland Craft

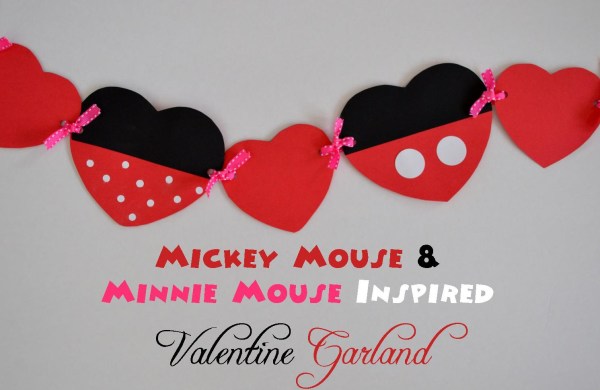
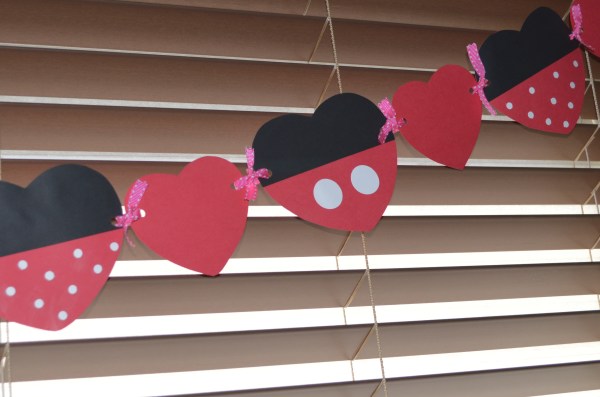
 Mickey and Minnie Valentine Garland by MouseEarsMom.com

Get out the paper, glue sticks, scissors, ribbon, and cookie cutters, it’s time to beat the snowed-in boredom!

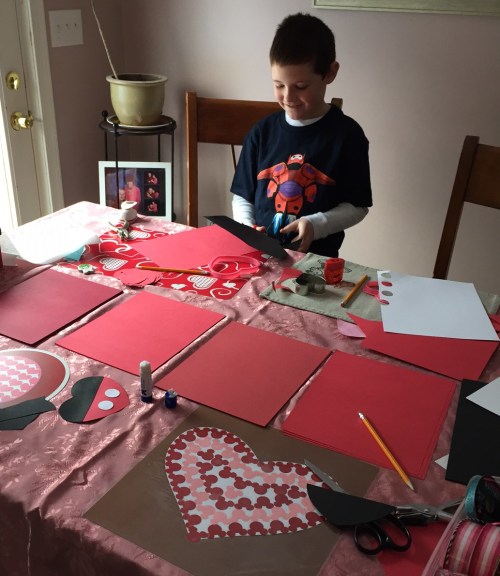
We’ve had quite a few snow days lately. If you have children, then you know that playing in the snow doesn’t fill an entire day for our little Mouseketeers.  The kids and I have been occupying that time with some fun Valentine crafts. Today I’m sharing how we made our Mickey and Minnie Mouse inspired valentine garland.

Supplies:

  • red cardstock
  • black cardstock
  • white card stock
  • standard hole punch
  • 1″ hole punch
  • two different size heart cookie cutters
  • glue stick
  • pencil
  • ribbon

www.mouseearsmom.com

Now start tracing and cutting out your hearts from the red and black cardstock.

Both Mickey and Minnie Mouse hearts are made by cutting off the top half of a black heart and gluing the black piece onto the top half of a red heart. The Mickey Mouse inspired hearts have his two white buttons and the Minnie hearts have her polka dots.  For Mickey’s buttons, punch two 1″ circles from the white card stock and glue the circles onto the red bottom half of a heart. For Minnie’s polka dots, we used a stand hole punch on white card stock and punched out 10 miniature circles.  (Remember to empty your hole punch before making Minnie’s polka dots.  It’ll save you from the clean up when your son dumps a hundred punches all over the table….experience has taught me.)

Once your hearts are glued and dried, use the standard hole punch to create holes on both sides of each heart. Connect the hearts together with some cute ribbons. Now you and your Mousketeers have made the cutest little Mickey and Minnie Valentine Garland in town!

Mickey and Minnie Inspired Valentine Garland www.mouseearsmom.com

Have you made any Disney-inspired Valentine’s Day decorations this year? I’d love for you to share them with me! Post a photo of your project on the Mouse Ears Mom Facebook page or if you’re a blogger and you have a tutorial, great!  Share the link in the comments!

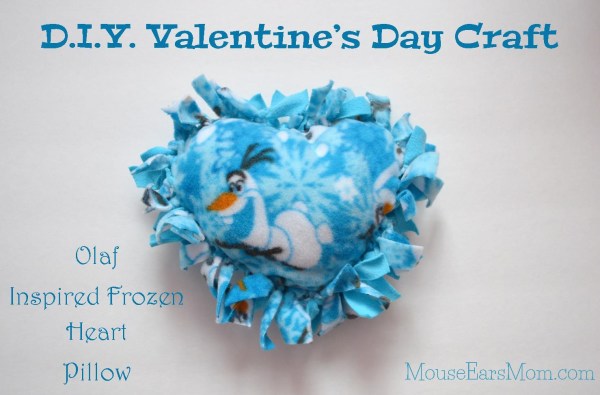
D.I.Y. Olaf Inspired Frozen Heart Pillow

Olaf Frozen No Sew Heart Pillow

Looking for a fun and inexpensive Frozen-Inspired Valentine’s Day craft to make with your children?

At JoAnn Fabrics this past weekend I found adorable Frozen themed fleece on sale for 40% off! With Valentine’s Day just around the corner I thought it would be cute to make a miniature (5.5″ wide x 7″ high) “Frozen” heart pillow with the kids.  After completing this one, Victoria, my three-year-old daughter, snatched it up for her Bitty Baby doll to use and Gavin, my seven-year-old son, immediately wanted to make one “all on his own.” How could he not? Don’t we all love this warm hug-loving little snowman?

I’m not the first person in the world to come up with the idea of a “no-sew” heart pillow. In fact, a quick Google search of “no sew heart pillow” will give you a ton of tutorial options to read. Regardless, I’ve included my tutorial in this post to give you some insight on how we made our pillow.

Supplies

Disney licensed material of any type is significantly more money per yard than your typical run of the mill fabric. So for this project I decided to use the licensed character fleece on one side and a generic blue on the opposite side.  In addition, if you’re planning on following my directions for this project to make more than one pillow, note that you’ll need more of the Olaf print than the blue fleece. Why? Due to the character placement on the fleece, you will end up with a pillow that doesn’t have Olaf’s face represented and instead you’ll have Olaf’s feet or a partial face. It’s important to decide what images you want shown on the pillow and measure out from there before you start cutting.

Here are the exact sizes and supplies I used for making one pillow.

  • 8″ x 7″ hand drawn heart template cut out of card stock
  • Measuring tape
  • Fabric scissors
  • Marking tool – I used a fine tip marker but a fabric pencil would have been easier.
  • 18″ x 14″ piece of fleece “Olaf Winter Snowflakes Scene by Disney for Springs Creative Products Group, LLC. (NOTE: This material is for noncommercial home use only.) Why this large? If you are choosing to make multiple pillows, I found that allotting this size piece will guarantee at least one Olaf image as a focal point for the pillow.
  • 14″ x 13″ piece of complimentary-colored solid blue fleece
  • Polyester Fiberfill

10 Simple Steps Tutorial

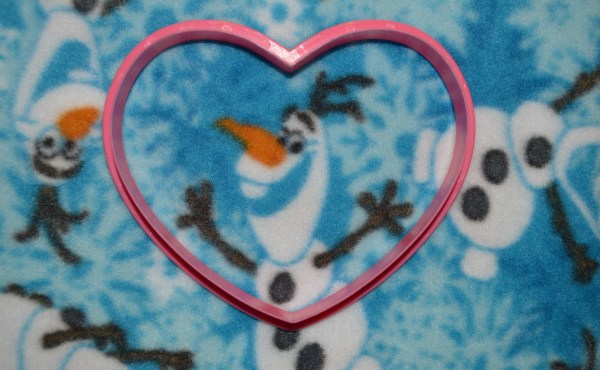
1. Using the heart template that you drew out of card stock, decide how you’d like the pillow to lay out. Below is an example of how I started. (However I chose to go larger as the original cookie cutter idea was way too small.)

Olaf Fabric www.mouseearsmom.com

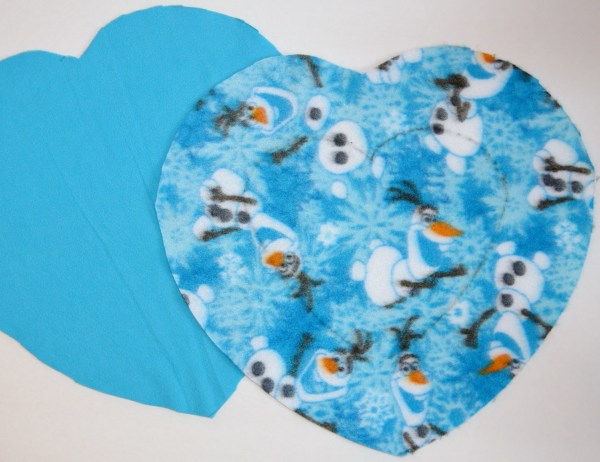
2. Draw your heart outline onto back side of the Olaf fabric using your template.

3. Measure three inches from all sides of the heart to create an outside heart image around the originally drawn heart.  (This three-inch border will be the area that you’ll need to mark and then cut for knotting.)

4. Cut an equal size heart out of the solid blue fleece. I did this by tracing my Olaf fabric heart after I cut it out.

Materials for Frozen hearts  www.mouseearsmom.com

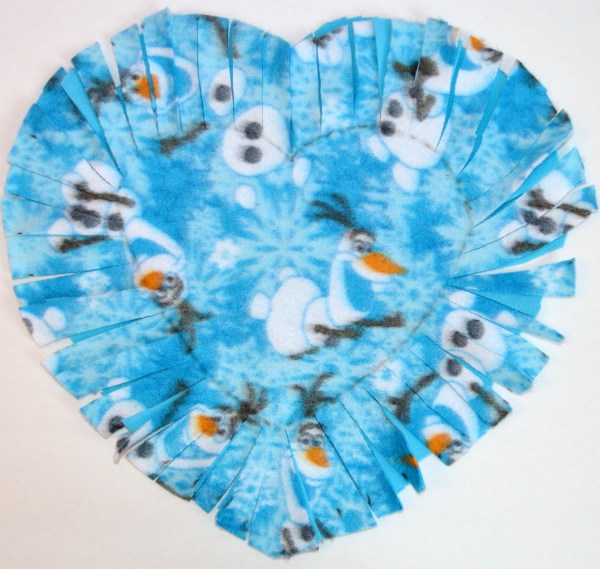
5. Using your measuring tape and marking tool, mark off 3/4″ to 1″ pieces around the perimeter of the heart. They will act as guide lines to follow when creating your fringe to later knot.

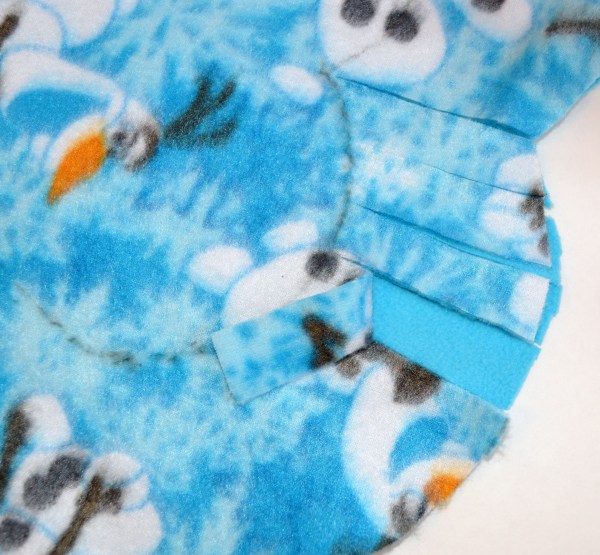
6. With the two pieces of fleece fabric placed on top of each other, cut three-inch strips into both layers of fleece at the same time.

www.mouseearsmom.com

7. Continue to cut three-inch strips from the outside of the heart to the center heart marking until you’ve cut the entire outside heart.

Frozen Heart Pillow www.mouseearsmom.com

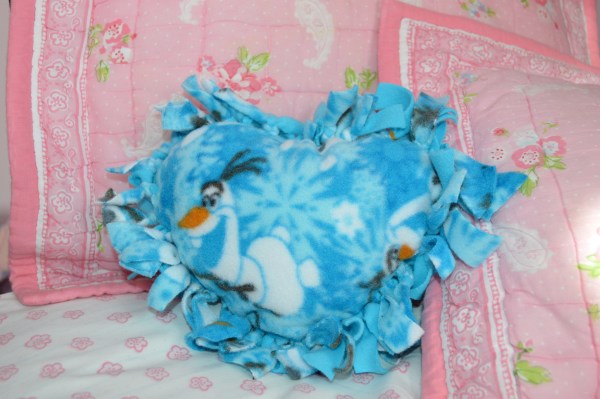
8. Start knotting!  Making sure that the correct side of the fabric is facing outwards, double knot each strand from the top fleece to the bottom fleece, stopping only when there is a about four or five strands left to knot.

9. Stuff the heart with Polyester Fiberfill.

10. Double knot the remaining strands and you’re done!

Olaf's Frozen Heart Pillow www.mouseearsmom.com

Although this little Valentine heart is frozen blue, I’m sure the hug-loving snowman on the outside will warm up the heart of your child this Valentine’s Day.

Have a great day and thanks for stopping by!